Showing posts with label recipe. Show all posts

Tuesday, April 14, 2015

Minecraft Cake


I enjoy making cakes and decorating them, tests my abilities to be creative. Now, I know nothing about this game, Minecraft, but one of the kids I work with is really into it and he was turning 13 so I wanted to make him a special cake for his special day of becoming a teenager. I tried Googling it to see what ideas would pop up to help me figure out how to decorate this cake. Now, there were some really neat ideas on there, but they seem to be ones that were very time consuming and I didn't have days to design this cake. I've also never worked with fondant and didn't want to start using it at a time where I'd have to roll and cut out hundreds of squares to make the all the little pixels that the game consists of.

I decided to go with the cut up and layered cake to make it look like it came from a scene from the game. I decided to make 4- 9 in square cakes. I didn't have the time to go out and buy all the ingredients to make these so I used box cake mix to make it easier. However, I did take the time to make the icing from scratch because store bought icing is way to sweet and well, I just don't like it. I made chocolate cake and for the filling icing, I tried making a mint chocolate chip icing, that turned out pretty delicious. I'll add the icing recipe below. For the outer icing, I made a mix of vanilla and chocolate chocolate chip icing.

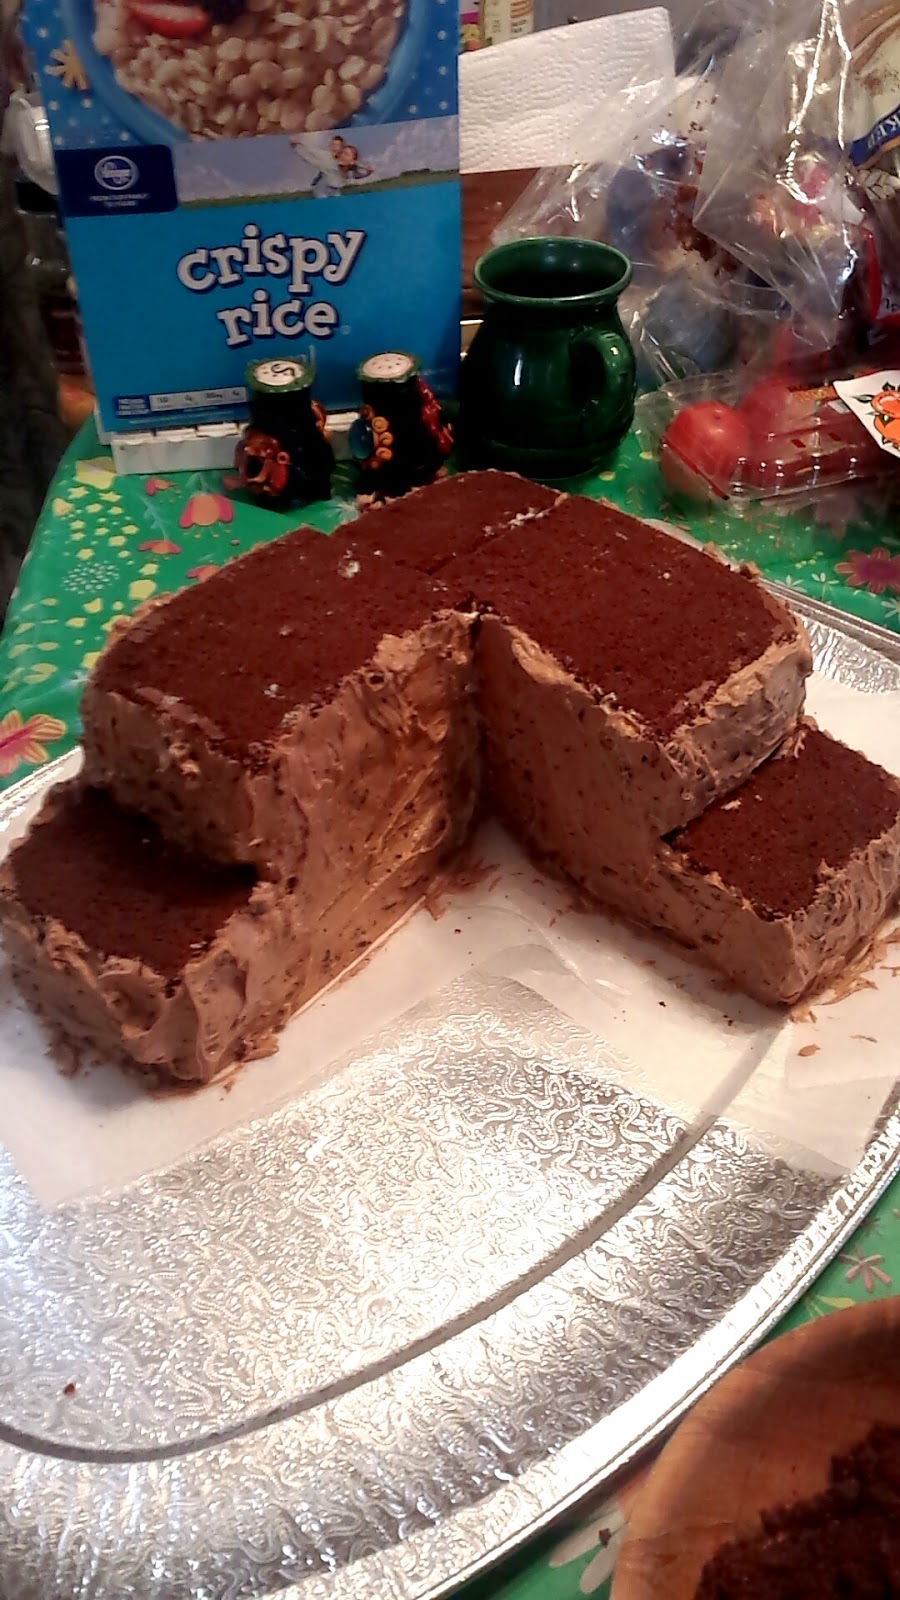
I made the cakes and threw them into the oven. It helps to put a square piece of parchment paper on the bottom of the pans and spray the sides with nonstick cooking spray so you don't find yourself with a rough bottom where parts stuck and you don't have an even square cake. Once they are completely cool, I cut the tops of the cakes off so they would be flat, since the middle usually rises, causing a hill and we want flat land for this cake. The tops I put aside and plan on making cake pops with them. With the flat squares, I put the icing in a plastic ziploc bag and cut the tip so it would squeeze out in a thick layer. I outlined the first square with the icing and then filled in the rest with more icing, laying one of the other pieces of cake on top. I repeated the same for the other two pieces of cake, so I ended up with two cakes filled with icing. Then I cut the cakes in half so I had 4 long pieces and cut two of them a bit shorter so I'd have a stair like effect, when layered. With the little bit of icing I had left, I used it to stick the pieces together.

Once it was in the shape that I wanted, I made another batch of icing, to cover the outside and make it look like one big piece instead of a few chunks. The second batch, I made just like the mint one, except I didn't put the peppermint oil in it. I used 1 tsp of vanilla extract instead. I also divided it into two parts 1/3 of it I added green food coloring to, to make the grass and the other 2/3 I added cocoa, to make it look like the dirt, as well as hand mixing in a handful of mini chocolate chips to make it look a little rocky.. Using cocoa made it a very light brown, not so much the dark dirt color that I was hoping for, so I took some of the cake that I had cut off earlier and crumbled it up and covered the chocolate icing with it. Make sure you don't cover the whole cake with it though. The tops of the pieces of cake should be covered with the green icing, piped on with the grass tip that you can find in the cake decorating section of a craft store or possibly even Walmart. I only needed one batch of icing to cover the whole cake but I really had to stretch it, so be careful when icing it so you don't run out. You can tell by looking at the picture, how the icing goes.

I tried making green rice krispy treats and wrapping them around KitKat sticks to make square trees like I saw online, but the rice krispy treats ended up being too heavy and made the trees sink into the cake, so instead, I made them into green slime cubes that you can find in the game. I think it ended up working better that way anyway. I also had little chocolates that looked like pieces of gold from the game that I put around the cake.

I was trying to figure out what to put on top of the cake since trying to make any character from the game out of gum paste was going to be impossible with the little amount of time I had to get it decorated and all the little figurines that you can buy of them, he already owned. So I found 3-D cardboard cutouts that you can buy and assemble and they worked perfectly. Once it was all done, I got a simple tube of icing, the kind that doesn't taste good, but it's good to write on cakes with and wrote Happy Birthday.

*NOTE: I needed to transport this across town and it didn't do well traveling 25 minutes, in the sun and going over bumps, but it was fixable. It'd probably be easier to have everything ready and bring it to your destination, if you need to move it, before assembling it with the outer icing. Or if you have someone to hold it for you and they can stay completely still, you'll be good too.
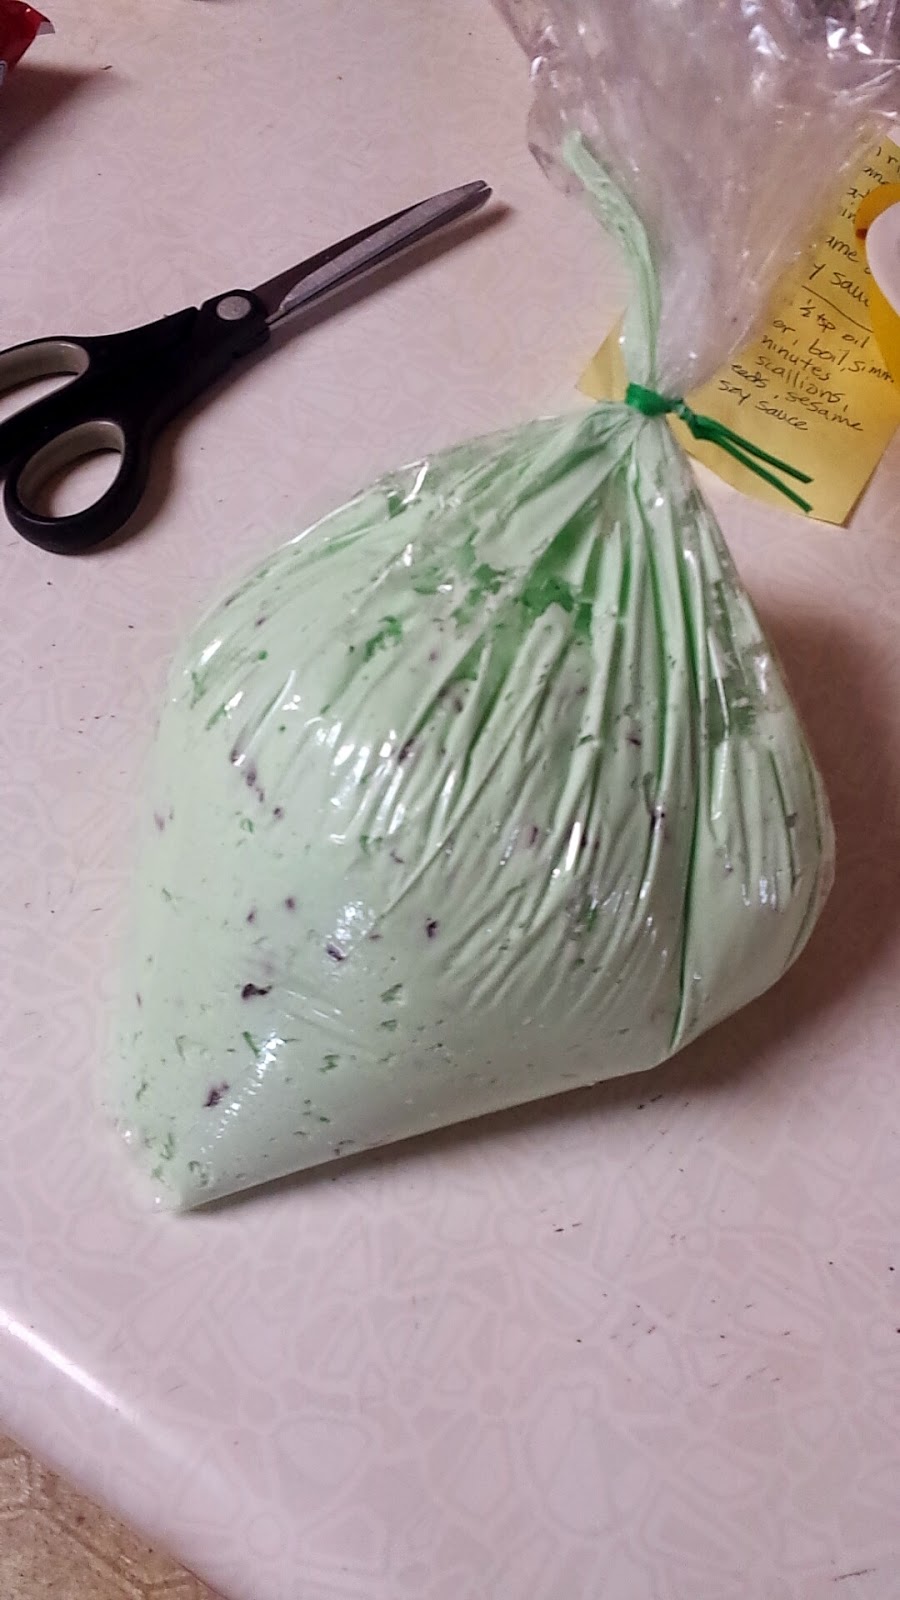


Mint Chocolate Chip Icing:
2 sticks of butter, room temperature
4 cups powdered sugar, sifted
2 tbsp milk
4-5 drops peppermint oil
3-4 drops green food coloring
1 cup mini chocolate chips

In the mixer, whip butter for 4-5 minutes until light and fluffy. Add powdered sugar a cup at a time along with the peppermint oil and food coloring. Add milk accordingly, if you feel it's too thick. Once all is mixed, beat another 3-4 minutes. Remove from mixer and hand mix in the mini chocolate chips.

*You can find the peppermint oil with the cake/candy making supplies at any craft store. You can also use peppermint extract from the grocery store, it's just not as strong and you may need to add more drops.

Monday, March 9, 2015

Homemade Pizza

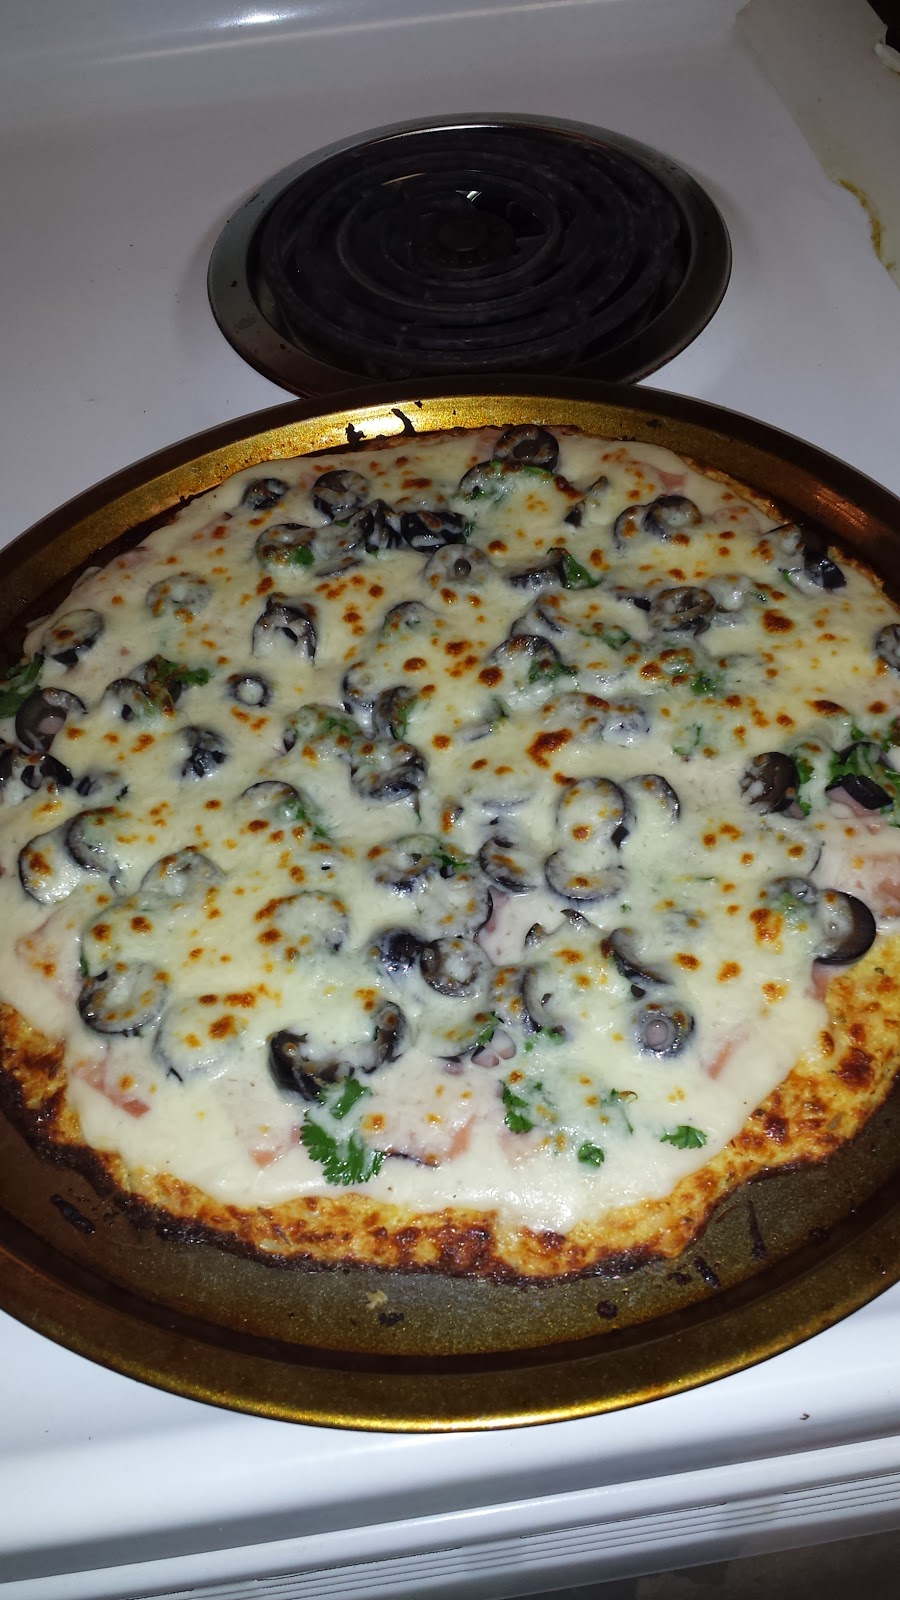
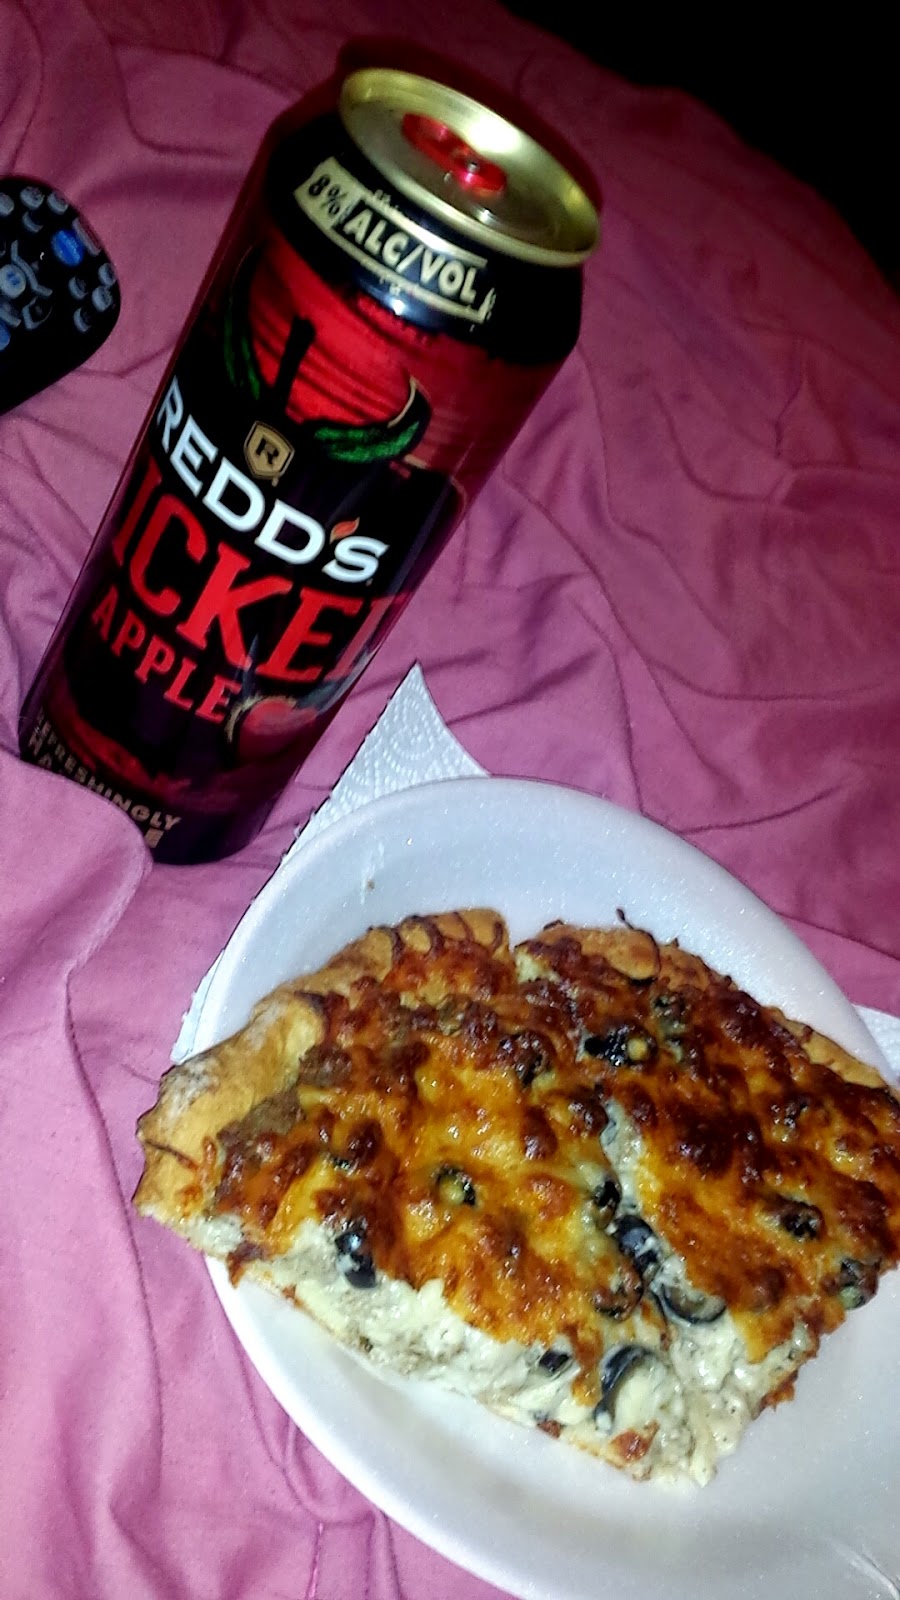
I think homemade always tastes better than store bought. Awhile back, an ex's parents gave me a recipe for an I guess, semi-homemade pizza. I thought I'd give it a shot and I haven't made pizza any other way since. I'm not a big fan of tomatoes so I much rather have white sauce or a pesto or even bbq sauce on my pizza than just typical tomato sauce. That's probably why I like making my own pizza so much. That and the fact that when you go to Pizza Hut or Dominos, they don't put many toppings nor do they put a lot of cheese that I like. This is a pretty easy way to make pizza at home and the topping possibilities are endless. I've made this recipe many times and have tried different sauces and different toppings and it has always turned out great.


I was originally taught to use this pizza kit. It comes in a box and is pretty cheap, but I only needed the dry ingredients in it to make the crust. I didn't use the cheese or the sauce or anything so it got to the point where I just started buying the cheap packs of pizza crust mix that usually cost under $1 and bought everything separate. If you are making your pizza with tomato sauce and you want pepperoni on it, then your better off buying this box and just buying some more toppings and some cheese to go with it.

To make the crust, follow the directions on whatever packet of dry ingredients you end up buying. I like to add garlic powder to mine to make it taste more like a breadstick. When the dough is mixed, drop about a tsp of canola oil on top the ball of dough, cover it with saran wrap and let it rest for 20 minutes.

While it's resting, prepare your toppings. Make sure if you're putting any kind of meat on your pizza that it is precooked. Don't put raw because the pizza doesn't cook long enough to thoroughly cook it. A few combinations that I've tried and really liked are:
  • bbq sauce, shredded chicken, olives, pineapple
  • white sauce, olives, ricotta cheese, spinach, ground turkey
  • basil pesto, shredded chicken, ricotta cheese, olives, cilantro
  • white sauce, ham, pineapple, olives
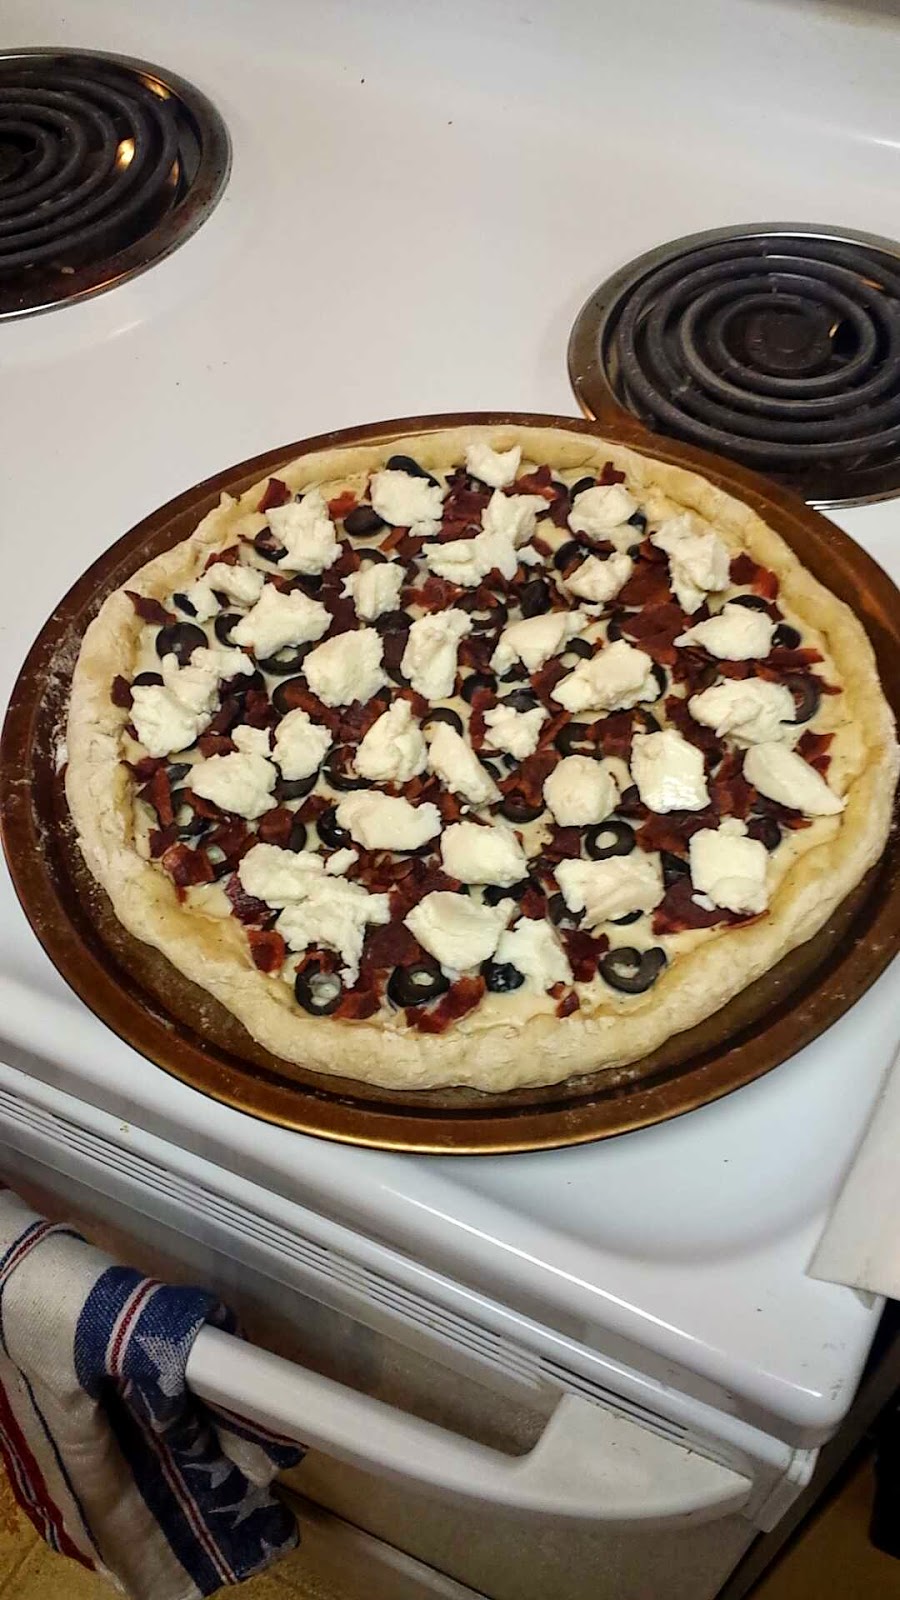
  • white sauce, ricotta cheese, crumbled bacon, olives
  • tomato sauce, pepperoni, turkey sausage, ham
 Preheat the oven to 400. Roll out or stretch the dough on a floured surface until it's about 12" round or will fit your pizza pan. Spray the pan with nonstick cooking spray and lay the dough out, folding up the edges to make a crust. You can also add cheese to the inside of the crust if you'd like. Use a fork and poke holes throughout the dough so air can circulate and your dough won't bubble up. Spread a layer of sauce evenly over the dough. Cover with you toppings. I like a lot of toppings so my pizzas are always pretty thick where you can't see much of the sauce anymore. Put it in the oven for 10-15 minutes. Take it out and cover your pizza with cheese. I usually buy a 2 cup bag of shredded mozzarella or pizza cheese and use the whole bag because I like a lot of cheese. Put it back in the oven and cook for another 15-20 minutes or until the cheese is lightly golden. Take out and let it set for 10 minutes. If you cut it right away, it'll fall apart, especially if you have a lot of stuff in it. I've learned from experience. Plus, it'll be too hot to eat anyway. Use a pizza cutter and cut the pizza into 6 pieces. That's usually the best size where it won't fall apart.

*Reheating leftovers: it tastes best if you put it on a baking sheet and pop it in the oven at 400 for about 10 minutes, but the microwave will do too, it just won't be crispy like it's straight out of the oven.


Friday, March 6, 2015

Crock pot Sweet Potato, Turkey and Quinoa Chili


Quinoa....this stuff is....different. I wanted to start cooking healthier and I started researching different grains that are better for you than others. I came across quinoa. I wasn't sure how it tasted and it was fairly new to hit popularity so not many people knew much about it. I originally tried it plain, without any seasonings or sauces because I wanted to see how it tasted. I didn't like it. But I didn't want to rule it out quite yet so I searched on Pinterest for recipes that looked good and could ease me into eating it and I came across this one for a chili where it was mixed with sweet potatoes and ground turkey and I actually really liked it. Most people may not like the initial taste of quinoa, but when you season it right and mix it with other things, it does taste pretty good. I decided to give this chili a try and tho I don't like beans I was able to omit them and still have a tasty meal. If you want the original with the beans in it like typical chili has, click on the link  http://iowagirleats.com/2014/01/13/crock-pot-sweet-potato-and-quinoa-turkey-chili/ and follow their recipe. I'm sure either version is just as good as the other.

*Note: You can buy quinoa rinsed or not, so make sure you check if it's been pre-rinsed before cooking it. The rinsed kind are a lot easier to cook with because when you have to rinse it yourself, it can make a bit of a mess because they're such small little balls, that they stick to everything. You can find bags of it at Costco or Sam's Club.

You'll need:
1 pound ground turkey
1 small onion, chopped
3 garlic cloves, minced
salt and pepper
4 cups chicken broth
1 28oz can crushed tomatoes
1 cup uncooked quinoa, rinsed
1 large sweet potato, peeled and chopped into small chunks
2 tbsp chili powder
1 tsp cumin
1/2 tsp salt
1/2 tsp paprika
1/4 tsp red chili pepper flakes In a large skillet, put a little bit of olive oil to coat the pan and saute the chopped onions 5-7 minutes. Add the ground turkey and sprinkle with salt and pepper. Cook until no longer pink. Make sure to break up the turkey so it's in smaller crumbles as it's cooking. Add garlic and let it cook 30 seconds more. Scrape out pan into your crock pot. Add remaining ingredients and cook on high for 3 hours or low for 6 hours. Check sweet potatoes to make sure they are tender, by sticking a knife through one. Pour into bowl and top with toppings of your choice.

*I topped mine with tortilla strips, shredded cheese and avocado. Fresh cilantro would've been good too.


*Save 1 cup of chicken broth to mix in when refrigerating it so it won't be dry when you reheat it.

Sweet Chicken (or Pork) Barbacoa


I don't eat fast food. The closest I get, is eating at Cafe Rio and there's only one thing that I get there every time I go: the Sweet Pork Barbacoa Salad. It is amazing. I'd eat it all the time if it wasn't so expensive and if it was a bit more healthier for me. I found a copykat recipe for it and thought I'd give it a try and hope that it tastes the same. It tastes pretty darn close. I've tried making this recipe a few times, a few different ways and each way came out tasting just as good. I tried going the little bit healthier route and using chicken breasts instead of pork. The original recipe in the link, uses pork butt, but my version will use chicken. You can always follow the link for the pork. They both taste great. http://www.onegoodthingbyjillee.com/2013/05/my-favorite-cafe-rio-copycat-recipes.html

The last time I tried this, I made the chicken and put it in lettuce leaves for a lettuce wrap feel and added a little bit of cheddar cheese, fresh cilantro, a couple slices of avocado, some cilantro lime rice and a few tortilla strips to give it that little bit of salty crunch. I've also made mine a salad in a taco bowl that I made from using my tortilla bowl molds and putting a tortilla in the oven to make it harden into a bowl shape.

You'll need:
4 chicken breasts
2 cans of Root Beer (I had a 2 liter bottle and used 1/2 of it)
1/2 cup brown sugar
1/2 tsp garlic
1/2 tsp salt
1/4 cup water
1 can diced green chiles
1 14oz can of enchilada sauce (red)
1 cup brown sugar

Marinate chicken in a mixture of 1 can of soda and the 1/2 cup brown sugar, in a reclosable bag. I like to marinate it overnight, but marinating it for a couple hours works just as well if you're short on time.

Drain the marinade and place chicken in your crockpot along with 1/2 of a can of root beer, water, garlic and salt. Cook on high 2-4 hours or low 7-8 hours. Remove chicken from pot and shred. At this point it should be easy to shred using two forks. If it doesn't fall apart easily, let it cook a little longer.

While chicken is cooking, in a blender preferably so you don't have big chunks of chiles, blend together the remaining 1/2 of can of soda, can of diced chiles, 1 cup brown sugar and the can of enchilada sauce.

Put the shredded chicken along with the sauce you just blended together, all back into the crockpot and heat through, for 15 minutes or so.


Thursday, March 5, 2015

Eggplant Parmesan

This is a fairly simple recipe. It's easy to make and it doesn't require a lot of ingredients.It's also a bit healthier than most recipes because you don't fry the eggplant, you bake it.

You'll need: 
1 medium to large eggplant
Jar of tomato sauce
2 cups shredded mozzarella cheese
1/2 cup parmesan cheese
2 eggs
Panko crumbs
Olive oil

Preheat the oven to 375. Scramble the eggs in a bowl and add a little bit of water to them so they're not as thick. In another bowl, pour in about a cup of the Panko crumbs. You'll probably need more, but it's better to use a little at a time so you don't waste much. Slice the eggplant in equal size slices, best at about 1/2 inch thick or you can slice them the long way too. Dip them in the egg mixture and then into the crumbs, coating both sides. Lay them single layer on a baking sheet and drizzle olive oil over them. Stick them in the over for 12 minutes. Take them out, flip them over and sprinkle olive oil over the other side and put back into the oven for another 12 minutes or until they're golden brown. Take them out and layer them in a baking dish:

 layer of sauce
layer of eggplant
layer of sauce
layer of cheese
layer of eggplant
layer of sauce
remainder of cheese

Put in oven for 15-20 minutes or until cheese is melted.

Thursday, February 26, 2015

Stuffed Sweet Potatoes

I'm not a huge fan of potatoes, but sweet potatoes, are awesome! I always like adding flavor to simple things, to make them extraordinary. I never liked feta or maybe I was scared to try it, but decided to give it a shot one day and turns out, it takes great.

You'll need:
Sweet potato
Feta cheese, crumbled
Chopped spinach, cooked
Chopped Garlic
Salt
Pepper

I like to cook my sweet potato in the oven, but if you're in a hurry, the microwave does just as good to cook it. In the oven, I put the potato on an aluminum foil lined pan and put it in a 400 degree oven for 30-40 minutes depending on how big it is. You can stick a knife in the largest part and if it easily goes through, it's done. In the microwave, I start with 5 minutes and flip it occasionally until a knife slides easily through it. When it's cooked, let it cool slightly so you can handle it. Slice it in half and gently scoop out the potato into a bowl, being careful not to break the skin so you can put it back. Or if you don't care about presentation, just leave it in the bowl. Mash the potato with a potato masher if you have one or just a fork, if you don't. Mix in the feta cheese, spinach and garlic and season it with salt and pepper. Carefully scoop it back into the skin before serving or  eat it straight out of the bowl.


Crock Pot Cream Cheese Chicken Chili

I love anything with cream cheese in it. I also love anything I can put in my crock pot. This recipe is super easy and doesn't have too many ingredients in it. The best part, you dump it all into the crock pot and leave it be.

I found this recipe used often online and they were all pretty much the same, but I based mine from http://www.truelifekitchen.com/2014/01/crock-pot-cream-cheese-chicken-chile.html Theirs has black beans in it, but I omitted them since I don't like beans and used fresh chicken instead of frozen, but I'm sure either version is as good as the other.


You'll need:

2 boneless skinless chicken breasts
1 can Rotel tomatoes
1 can corn kernels, not drained
1 pkg Ranch dressing mix
1 tbsp cumin
1 tsp chili powder
1 tsp onion powder
1 8oz pkg cream cheese

Put chicken in crock pot. Pour all other ingredients over top of chicken, except cream cheese, and stir. Lay cream cheese on top. Cover. Cook on low 6-8 hours or high 3-4 hours. You can stir once or twice throughout the cooking process. It will look like the ingredients separated, like you did something wrong, but don't worry. After the full time cooking, mix it well and the everything will combine correctly. Either break up the chicken or as I like to, shred the chicken.

*I like to put mine over a bed of brown rice.


  • 2 chicken breasts, still frozen
  • 1 can Rotel tomatoes
  • 1 can corn kernels, do not drain
  • 1 can black beans, drained and rinsed
  • 1 pkg. Ranch dressing mix
  • 1 T cumin
  • - See more at: http://www.truelifekitchen.com/2014/01/crock-pot-cream-cheese-chicken-chile.html#sthash.UIdpkt7g.dpuf


  • 2 chicken breasts, still frozen
  • 1 can Rotel tomatoes
  • 1 can corn kernels, do not drain
  • 1 can black beans, drained and rinsed
  • 1 pkg. Ranch dressing mix
  • 1 T cumin
  • - See more at: http://www.truelifekitchen.com/2014/01/crock-pot-cream-cheese-chicken-chile.html#sthash.UIdpkt7g.dpuf


  • 2 chicken breasts, still frozen
  • 1 can Rotel tomatoes
  • 1 can corn kernels, do not drain
  • 1 can black beans, drained and rinsed
  • 1 pkg. Ranch dressing mix
  • 1 T cumin
  • - See more at: http://www.truelifekitchen.com/2014/01/crock-pot-cream-cheese-chicken-chile.html#sthash.UIdpkt7g.dpuf


  • 2 chicken breasts, still frozen
  • 1 can Rotel tomatoes
  • 1 can corn kernels, do not drain
  • 1 can black beans, drained and rinsed
  • 1 pkg. Ranch dressing mix
  • 1 T cumin
  • - See more at: http://www.truelifekitchen.com/2014/01/crock-pot-cream-cheese-chicken-chile.html#sthash.UIdpkt7g.dpuf


  • 2 chicken breasts, still frozen
  • 1 can Rotel tomatoes
  • 1 can corn kernels, do not drain
  • 1 can black beans, drained and rinsed
  • 1 pkg. Ranch dressing mix
  • 1 T cumin
  • - See more at: http://www.truelifekitchen.com/2014/01/crock-pot-cream-cheese-chicken-chile.html#sthash.UIdpkt7g.dpuf


  • 2 chicken breasts, still frozen
  • 1 can Rotel tomatoes
  • 1 can corn kernels, do not drain
  • 1 can black beans, drained and rinsed
  • 1 pkg. Ranch dressing mix
  • 1 T cumin
  • - See more at: http://www.truelifekitchen.com/2014/01/crock-pot-cream-cheese-chicken-chile.html#sthash.UIdpkt7g.dpuf


  • 2 chicken breasts, still frozen
  • 1 can Rotel tomatoes
  • 1 can corn kernels, do not drain
  • 1 can black beans, drained and rinsed
  • 1 pkg. Ranch dressing mix
  • 1 T cumin
  • - See more at: http://www.truelifekitchen.com/2014/01/crock-pot-cream-cheese-chicken-chile.html#sthash.UIdpkt7g.dpuf


  • 2 chicken breasts, still frozen
  • 1 can Rotel tomatoes
  • 1 can corn kernels, do not drain
  • 1 can black beans, drained and rinsed
  • 1 pkg. Ranch dressing mix
  • 1 T cumin
  • - See more at: http://www.truelifekitchen.com/2014/01/crock-pot-cream-cheese-chicken-chile.html#sthash.UIdpkt7g.dpuf


  • 2 chicken breasts, still frozen
  • 1 can Rotel tomatoes
  • 1 can corn kernels, do not drain
  • 1 can black beans, drained and rinsed
  • 1 pkg. Ranch dressing mix
  • 1 T cumin
  • - See more at: http://www.truelifekitchen.com/2014/01/crock-pot-cream-cheese-chicken-chile.html#sthash.UIdpkt7g.dpuf


  • 2 chicken breasts, still frozen
  • 1 can Rotel tomatoes
  • 1 can corn kernels, do not drain
  • 1 can black beans, drained and rinsed
  • 1 pkg. Ranch dressing mix
  • 1 T cumin
  • - See more at: http://www.truelifekitchen.com/2014/01/crock-pot-cream-cheese-chicken-chile.html#sthash.UIdpkt7g.dpuf


  • 2 chicken breasts, still frozen
  • 1 can Rotel tomatoes
  • 1 can corn kernels, do not drain
  • 1 can black beans, drained and rinsed
  • 1 pkg. Ranch dressing mix
  • 1 T cumin
  • - See more at: http://www.truelifekitchen.com/2014/01/crock-pot-cream-cheese-chicken-chile.html#sthash.UIdpkt7g.dpuf


  • 2 chicken breasts, still frozen
  • 1 can Rotel tomatoes
  • 1 can corn kernels, do not drain
  • 1 can black beans, drained and rinsed
  • 1 pkg. Ranch dressing mix
  • 1 T cumin
  • 1 t chili powder
  • 1 t onion powder
  • 1 8-oz pkg. cream cheese
  • - See more at: http://www.truelifekitchen.com/2014/01/crock-pot-cream-cheese-chicken-chile.html#sthash.UIdpkt7g.dpuf


  • 2 chicken breasts, still frozen
  • 1 can Rotel tomatoes
  • 1 can corn kernels, do not drain
  • 1 can black beans, drained and rinsed
  • 1 pkg. Ranch dressing mix
  • 1 T cumin
  • 1 t chili powder
  • 1 t onion powder
  • 1 8-oz pkg. cream cheese
  • - See more at: http://www.truelifekitchen.com/2014/01/crock-pot-cream-cheese-chicken-chile.html#sthash.UIdpkt7g.dpuf


  • 2 chicken breasts, still frozen
  • 1 can Rotel tomatoes
  • 1 can corn kernels, do not drain
  • 1 can black beans, drained and rinsed
  • 1 pkg. Ranch dressing mix
  • 1 T cumin
  • 1 t chili powder
  • 1 t onion powder
  • 1 8-oz pkg. cream cheese
  • - See more at: http://www.truelifekitchen.com/2014/01/crock-pot-cream-cheese-chicken-chile.html#sthash.UIdpkt7g.dpuf


  • 2 chicken breasts, still frozen
  • 1 can Rotel tomatoes
  • 1 can corn kernels, do not drain
  • 1 can black beans, drained and rinsed
  • 1 pkg. Ranch dressing mix
  • 1 T cumin
  • 1 t chili powder
  • 1 t onion powder
  • 1 8-oz pkg. cream cheese
  • - See more at: http://www.truelifekitchen.com/2014/01/crock-pot-cream-cheese-chicken-chile.html#sthash.UIdpkt7g.dpuf

    Soft Baked Pretzels


    This is a copykat recipe of Auntie Anne's pretzels. I got the recipe from http://www.food.com/recipe/auntie-annes-pretzels-copycat-59462

    You will need:
    1 1⁄2 cups water, luke warm
    1 1⁄4 tsp active dry yeast (1 pkg.)
    2 tbsp brown sugar
    1 1⁄4 tsp salt
    1 cup bread flour
    3 cups flour
    2 cups water
    2 tbsp baking soda
    coarse salt

    Toppings:
    butter (melted)

    cinnamon sugar
    ranch dressing seasoning
    sour cream and onion seasoning
    cheddar cheese and jalapenos

    Stir yeast into bowl of lukewarm water until dissolved. Add sugar and salt and stir to dissolve. Then  add flour and knead dough until smooth and elastic. Let rise at least 1/2 hour.
    Let rise.

    While dough is rising, stir together 2 cups warm water and 2 tbsp baking soda until dissolved. Set aside.
    After it rises.
    After dough has risen, divide dough into twelve equal pieces and roll into a long rope (about 1/2 inch or less thick) and shape into pretzel shape.
    Dip pretzel in baking soda solution and place on greased baking sheet. Allow pretzels to rise again for 10 minutes. If you allow to rise too long, they will get pretty puffy and somewhat loose the pretzel shape, like some of mine did, but they taste just as good. Bake in oven at 450 for about 10 minutes or until golden.

    Brush with or dip it in melted butter and sprinkle with coarse salt. You can also try sprinkling it with things like cinnamon sugar or Ranch dressing mix (powder). I thought about sprinkling some shredded cheddar cheese and slices of jalapenos on top as well, before popping it into the oven.

    French Dip Sliders


    Whenever I got to meet up with friends for lunch, we'd go to Applebees for their lunch specials. They had these little french dip sliders as one of their options and they were sooo good. I thought I'd try to come up with a recipe that was like them, but one that I could make at home.

    You'll need:
    King's Hawaiian Original Sweet Hawaiian Dinner Rolls 12 ct
    12 slices of roast beef
    6 slices of swiss cheese
    Au Jus gravy mix packet (or can create from scratch)

    You can use any other small slider size roll, if there's a different one you like. I like using the sweet hawaiian rolls because it adds a little more flavor with the sweetness. Preheat your oven to 350 degrees. Split the rolls in half, try to keep both parts attached. Fold up a piece of roast beef and set on slider. Rip a piece of cheese in half and lay on top the roast beef. Do this for all rolls. Stick in oven for 10-15 minutes or until cheese is melted and rolls are slightly toasted, take out of oven and put top of roll over the cheese, completing the slider. While they are in the oven, you can either make an au jus sauce from scratch or do what I did and buy a packet of the seasonings and follow the directions on the packet to make the gravy. Serve it in a little bowl along side the sliders so you can dip the mini sandwiches in it.

    Sunday, February 22, 2015

    Moroccan Chicken with Green Olives


    I've never tried Moroccan chicken before, but I was looking for a new way to cook some boneless skinless chicken breasts. I found this recipe from google and I'm sure glad I did. I LOVE olives and will put them in any recipe that I think they would work in.

    http://www.epicurious.com/recipes/food/views/moroccan-chicken-with-green-olives-and-lemon-352532 is the original source that I based my recipe on.

    Now, I thought I had lemons, but they turned out to be like a lemon/orange mix that tasted horrible so I didn't put the lemon in. Instead I added a lot more green olives and I halved the amount of cumin because some people aren't huge fans of spicy.


    1 tbsp olive oil
    1 medium onion, thinly sliced
    2 garlic cloves, chopped
    1 tbsp paprika
    1 tsp ground cumin
    1 tsp ground cinnamon
    1 tsp ground ginger
    2 cups chicken broth
    4 bonless skinless chicken breasts, cut in halves
    1 jar green olives. cut in half, pimentos removed


     Heat oil in large skillet over med-high heat. Add onion and sprinkle with salt and pepper; sauté until golden brown, about 6-8 minutes. Add garlic, paprika, cumin, cinnamon and ginger; stir 1 minute. Add chicken broth; bring to boil. Add chicken to skillet. Cover, reduce heat to med-low, and simmer until chicken is cooked through, turning occasionally, 25 to 30 minutes. Transfer chicken to platter. Add olives to skillet. Increase heat to high; boil uncovered to thicken slightly, about 5 minutes. Season with salt and pepper. Put chicken back in skillet, spoon sauce over chicken and serve.

    *I served mine with brown rice.

    Saturday, February 21, 2015

    Herb and Citrus Oven Roasted Chicken


    I stumbled across this recipe on Pinterest one day and it looked pretty good, so I thought I'd give it a shot.

     http://www.thecomfortofcooking.com/2013/04/herb-and-citrus-oven-roasted-chicken.html#comment-23885 is where I got the original recipe from. Feel free to take a look at it.


    Before      After

    I changed a few things from the original recipe, so I will put what used on here.

    1/4 cup olive oil
    4 cloves of garlic,chopped
    2 tbsp sugar
    1 whole lemon, half juiced and half sliced
    3 whole oranges, one and a half juiced and one and a half sliced
    1 tbsp Italian seasoning
    1/2 tsp paprika
    1 tsp onion powder
    1/4 tsp crushed red pepper flakes
    Kosher salt and freshly ground pepper, to taste
    10-12 pieces (about 4 1/2 lbs.) boneless skinless chicken thighs or chicken breasts cut in half
    1 medium yellow onion, thinly sliced
    1 tbsp dried rosemary


    Preheat oven to 400 degrees. Mix together olive oil, garlic, sugar, lemon juice, orange juice, Italian seasoning, paprika, onion powder, red pepper flakes, and salt and pepper. If you plan on marinating the chicken, now is the time to put the mixture and chicken in a ziploc bag and put into the refrigerator. I marinated the chicken overnight to make sure it was as flavorful as possible. If not marinating, then move to the next step. Place chicken in a single layer in a 13x9 baking dish. Pour olive oil mixture all over chicken, turning pieces to coat all sides. Arrange slices of lemon, orange and onion around and under the chicken. Sprinkle all over generously with rosemary, salt and pepper.
    Cook for 30-35 minutes until the juices run clear.

    *I tried eating the oranges after and didn't think they tasted good at all, but the chicken was delicious.

    Tuesday, February 17, 2015

    Bacon Wrapped Stuffed Dates

    Now, I'm not one to like dates or blue cheese, but when I first tried these at one of my favorite tapas places, Firefly, I fell in love. I looked all over trying to find a copykat recipe and came across this one that turned out amazing after I adjusted a few things to my liking and to what I actually had in my kitchen. I made a little bit simpler, less sweet version (because I didn't make the sauce and crumble blue cheese over them), but everybody agreed that they were just the right amount of sweet, creamy, salty and crunchy. They're actually fairly simple to make.


    1 pkg of cream cheese (8oz bar)
    1 bag of pitted dates
    1 bag of whole almonds (I used unsalted)
    1 lb bacon
    Toothpicks

    Preheat oven to 400 degrees or if you have a broiler option, that works too. I've tried both and they both work, just keep a close eye if broiling to make sure the bacon doesn't burn.

    Now the original recipe said it makes 18, but as you can tell from the picture, mine made a bit more, so the amount varies on the amount of ingredients you have on hand. I made as many as I could with the amount of dates I had since those seemed to be the thing I had the least of. I cut the cream cheese into little sticks, just big enough to fit inside the dates, stuck an almond in the middle of the cheese and stuffed that into the dates. Once they were all stuffed, I cut the bacon (saved it for last since it's greasy, raw and makes a mess) and cut each strip into 3s. Then I wrapped each date with one piece of bacon and secured it with a toothpick, being careful to not try to stick it through the almond and stab yourself.

    I put them on a cookie sheet lined with aluminum foil and stuck them in the oven for about 5 minutes or so, just until the bacon crisped up, took them out, flipped them over for another 5 or so minutes. They don't need to be that far apart from each other because they don't get any bigger in the oven. It helps to put them on paper towels after to soak up some of the extra grease from the bacon. And enjoy!


    *Tip: If you want to prevent the toothpicks from burning, you can soak them in water first.

    They look like a lot, but trust me, they'll be gone in minutes!