Showing posts with label cake. Show all posts

Tuesday, April 14, 2015

Minecraft Cake


I enjoy making cakes and decorating them, tests my abilities to be creative. Now, I know nothing about this game, Minecraft, but one of the kids I work with is really into it and he was turning 13 so I wanted to make him a special cake for his special day of becoming a teenager. I tried Googling it to see what ideas would pop up to help me figure out how to decorate this cake. Now, there were some really neat ideas on there, but they seem to be ones that were very time consuming and I didn't have days to design this cake. I've also never worked with fondant and didn't want to start using it at a time where I'd have to roll and cut out hundreds of squares to make the all the little pixels that the game consists of.

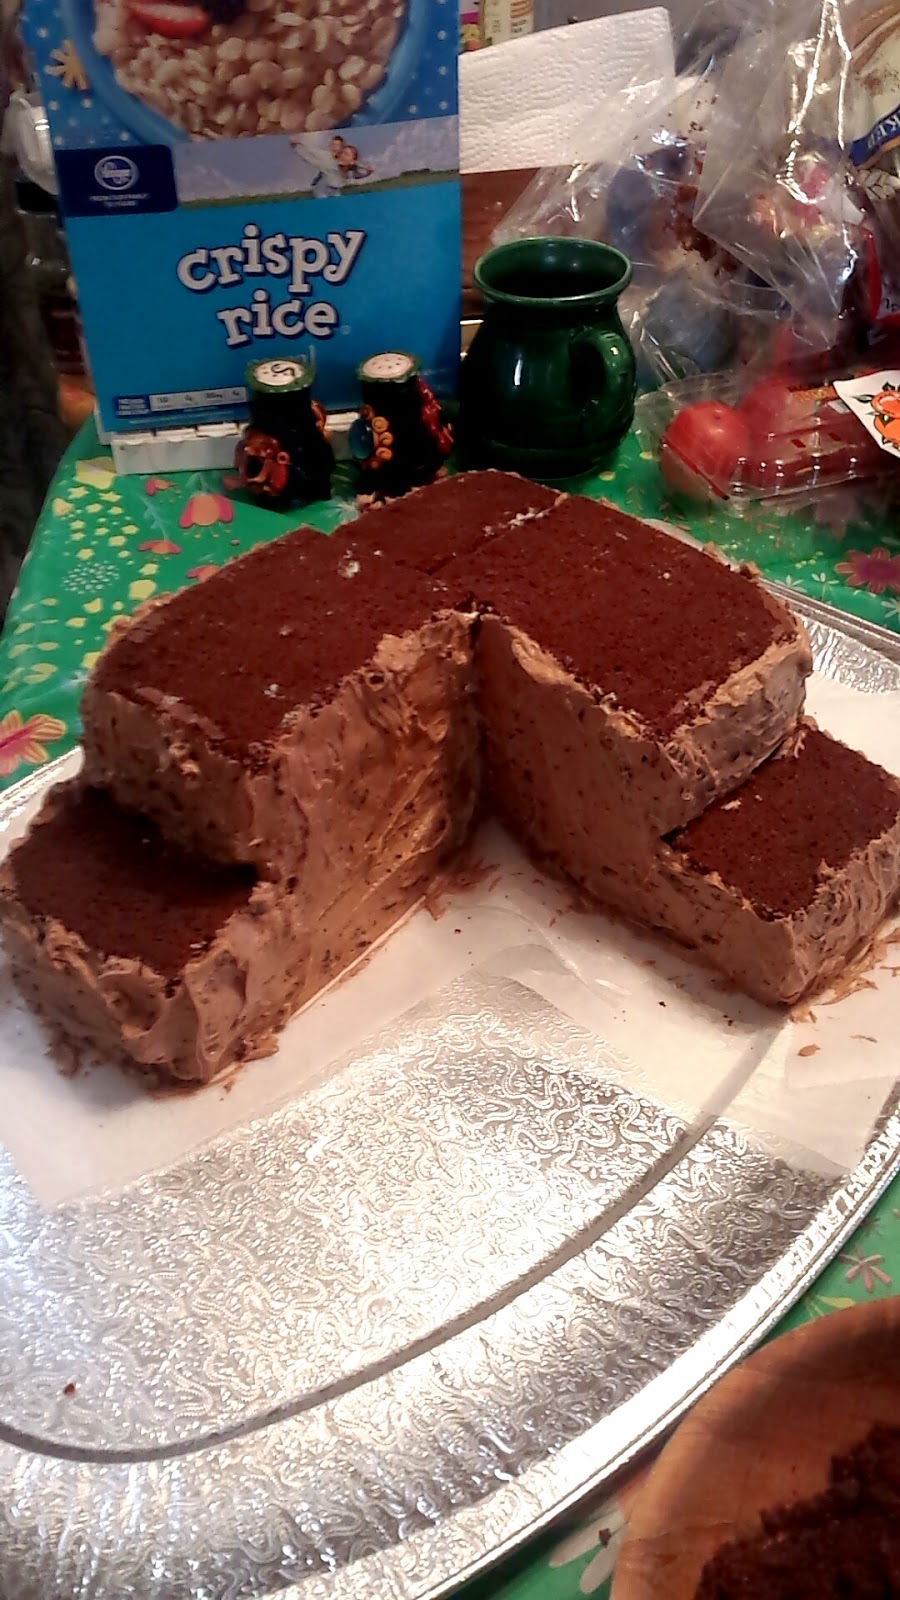
I decided to go with the cut up and layered cake to make it look like it came from a scene from the game. I decided to make 4- 9 in square cakes. I didn't have the time to go out and buy all the ingredients to make these so I used box cake mix to make it easier. However, I did take the time to make the icing from scratch because store bought icing is way to sweet and well, I just don't like it. I made chocolate cake and for the filling icing, I tried making a mint chocolate chip icing, that turned out pretty delicious. I'll add the icing recipe below. For the outer icing, I made a mix of vanilla and chocolate chocolate chip icing.

I made the cakes and threw them into the oven. It helps to put a square piece of parchment paper on the bottom of the pans and spray the sides with nonstick cooking spray so you don't find yourself with a rough bottom where parts stuck and you don't have an even square cake. Once they are completely cool, I cut the tops of the cakes off so they would be flat, since the middle usually rises, causing a hill and we want flat land for this cake. The tops I put aside and plan on making cake pops with them. With the flat squares, I put the icing in a plastic ziploc bag and cut the tip so it would squeeze out in a thick layer. I outlined the first square with the icing and then filled in the rest with more icing, laying one of the other pieces of cake on top. I repeated the same for the other two pieces of cake, so I ended up with two cakes filled with icing. Then I cut the cakes in half so I had 4 long pieces and cut two of them a bit shorter so I'd have a stair like effect, when layered. With the little bit of icing I had left, I used it to stick the pieces together.

Once it was in the shape that I wanted, I made another batch of icing, to cover the outside and make it look like one big piece instead of a few chunks. The second batch, I made just like the mint one, except I didn't put the peppermint oil in it. I used 1 tsp of vanilla extract instead. I also divided it into two parts 1/3 of it I added green food coloring to, to make the grass and the other 2/3 I added cocoa, to make it look like the dirt, as well as hand mixing in a handful of mini chocolate chips to make it look a little rocky.. Using cocoa made it a very light brown, not so much the dark dirt color that I was hoping for, so I took some of the cake that I had cut off earlier and crumbled it up and covered the chocolate icing with it. Make sure you don't cover the whole cake with it though. The tops of the pieces of cake should be covered with the green icing, piped on with the grass tip that you can find in the cake decorating section of a craft store or possibly even Walmart. I only needed one batch of icing to cover the whole cake but I really had to stretch it, so be careful when icing it so you don't run out. You can tell by looking at the picture, how the icing goes.

I tried making green rice krispy treats and wrapping them around KitKat sticks to make square trees like I saw online, but the rice krispy treats ended up being too heavy and made the trees sink into the cake, so instead, I made them into green slime cubes that you can find in the game. I think it ended up working better that way anyway. I also had little chocolates that looked like pieces of gold from the game that I put around the cake.

I was trying to figure out what to put on top of the cake since trying to make any character from the game out of gum paste was going to be impossible with the little amount of time I had to get it decorated and all the little figurines that you can buy of them, he already owned. So I found 3-D cardboard cutouts that you can buy and assemble and they worked perfectly. Once it was all done, I got a simple tube of icing, the kind that doesn't taste good, but it's good to write on cakes with and wrote Happy Birthday.

*NOTE: I needed to transport this across town and it didn't do well traveling 25 minutes, in the sun and going over bumps, but it was fixable. It'd probably be easier to have everything ready and bring it to your destination, if you need to move it, before assembling it with the outer icing. Or if you have someone to hold it for you and they can stay completely still, you'll be good too.
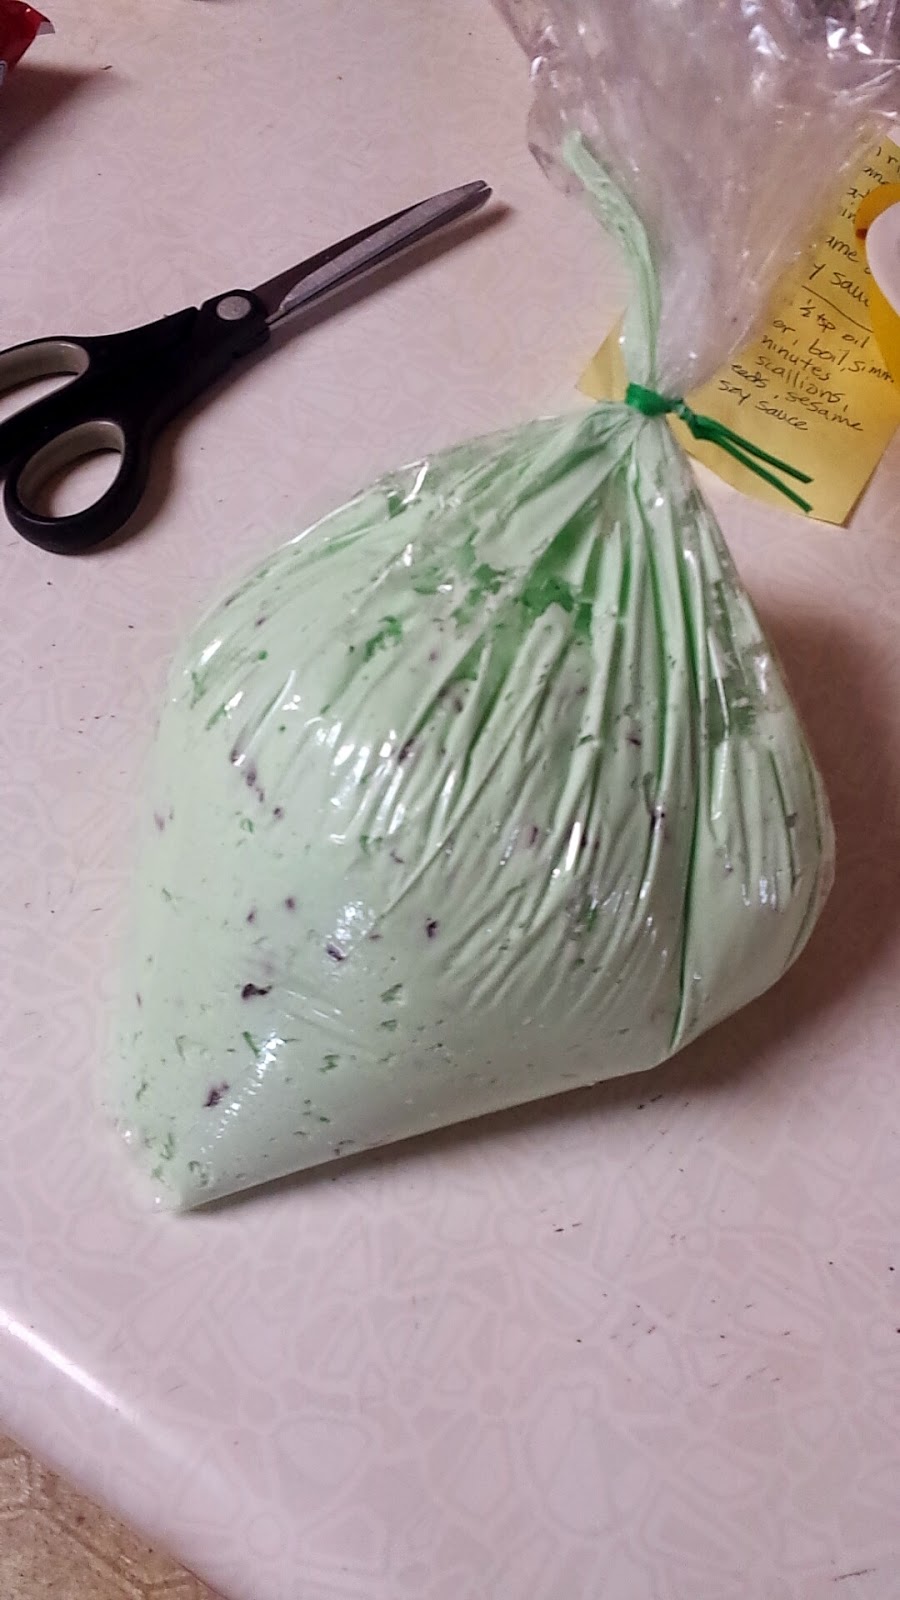


Mint Chocolate Chip Icing:
2 sticks of butter, room temperature
4 cups powdered sugar, sifted
2 tbsp milk
4-5 drops peppermint oil
3-4 drops green food coloring
1 cup mini chocolate chips

In the mixer, whip butter for 4-5 minutes until light and fluffy. Add powdered sugar a cup at a time along with the peppermint oil and food coloring. Add milk accordingly, if you feel it's too thick. Once all is mixed, beat another 3-4 minutes. Remove from mixer and hand mix in the mini chocolate chips.

*You can find the peppermint oil with the cake/candy making supplies at any craft store. You can also use peppermint extract from the grocery store, it's just not as strong and you may need to add more drops.

Monday, February 23, 2015

Strawberry Whipped Cream Roll

I have a huge sweet tooth and growing up, my mom always made me a homemade birthday cake. There was one specific cake that I would always ask for year after year, the strawberry whipped cream roll. It was sweet, but not too sweet , light and fluffy and so good, that everybody always came back looking for more. It got to the point where we had to start making two every time because it would be gone so quickly. One thing to remember tho, is that you are using fresh strawberries so they do get moldy if not eaten up within a few days, but you should never have to worry about throwing any of it away. Kids love it, adults love it and it's perfect for anybody who doesn't want something too sweet but needs to feed their craving.


For the cake:
1 cup flour
1 tsp baking powder
1/4 tsp salt
3 large eggs
1 cup sugar
1/3 cup water

Preheat oven to 375 degrees. Grease and line with parchment paper, a 15 1/2 x 10 1/2 x 1 pan. Also known as a jellyroll pan.
Blend flour, baking powder and salt in a bowl. Beat eggs 2-3 minutes until thick. Add sugar. Blend in water and vanilla. Fold in flour mixture. Bake 12-15 minutes.
Take out of pan and put on a powdered sugar covered dish towel and roll up. Let cool.

For the whipped cream:
1 cup chilled whipping cream
1/4 cup powdered sugar, sifted
1 tsp vanilla

Whip whipping cream, powdered sugar and vanilla until thick and fluffy.

1/2 lb strawberries, sliced and patted dry

When cake is cool, unroll, cover with a layer of whipped cream and a layer of strawberries. Roll back up and refrigerate.

Saturday, February 21, 2015

Cake Pops are In

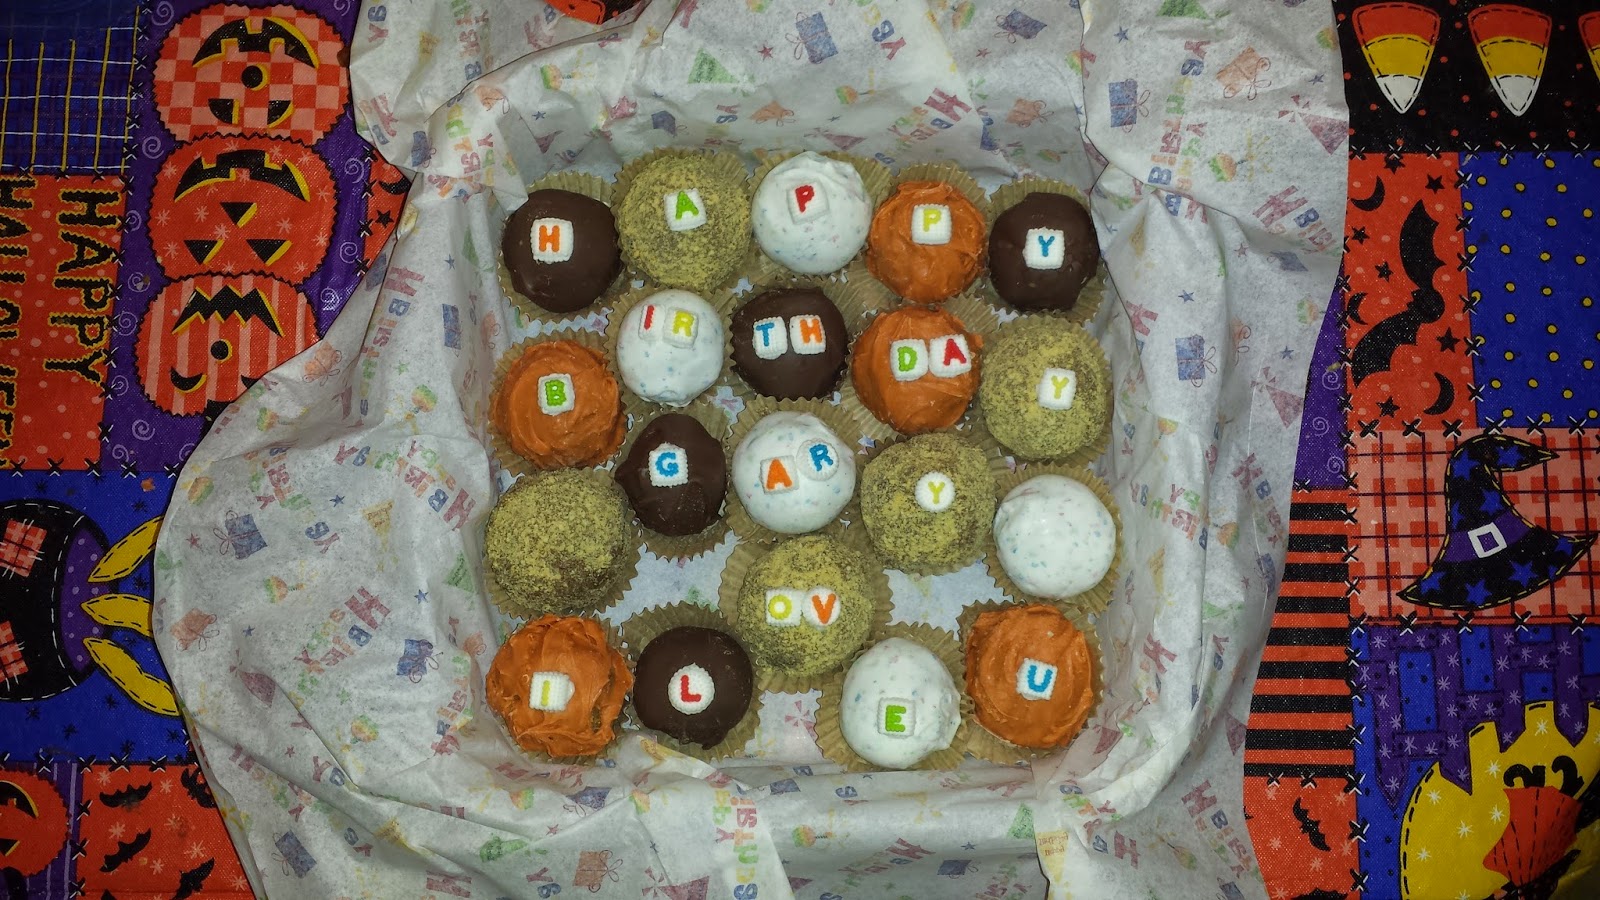
I wanted to make my boyfriend and my brother, awesome birthday cakes, but I know sending a cake in the mail from Las Vegas to Alaska or Las Vegas to New Jersey, was not going to look like a cake when it got there, so I had to come up with a solution to get something to them since I wasn't going to be able to be there to help them celebrate. Then I remembered the new trend....cake pops. I used to always wonder how cake pops were made because they were so cute. I tried buying the cake pop maker, but that just made little doughnut hole type things and they never tasted like the cake pops that I would eat out places. After some research, I realized I was making them all wrong. If you don't know how to make them, the simple way is to make a cake, any flavor that you like, make a batch of icing, in the flavor that you prefer (a half of a batch of icing would probably be more than enough) and get some chocolate melts that you can find at your local Walmart or any craft store by the cake decorationg supplies and that's all you need.


When the cake is cool, crumble it up and mix it with the icing, little by little until there's enough icing that turns the crumbs into a sticky dough like texture. Then you can start rolling balls like you would if you were making meatballs, put them on a tray of parchment paper and pop them in the freezer for 15-20 minutes until they're firm and wont fall apart.


Get a stick, ones that you can find with all the candy making stuff, and stick one in each ball. I've learned that it helps if you put a little icing on the end of the stick before you insert it in the ball and then put it in the fridge for a few minutes to set. It keeps the ball from falling off the stick when it comes time to coating it in the chocolate. I've found it helpful to cut those sticks is in half if you get the long ones.


If you can't find the sticks or just want to make them look like little candies, you can make them into just cake balls like I did and put them in the little paper cups and make them look fancy.


While the balls are firming up, get some melting chocolate coins and microwave them to melt them (see instructions on package). Make sure they're melted enough because if the chocolate isn't soft enough, it can break apart your cake ball.

There's so many good flavor combinations out there, that it was hard to pick one to make and I knew they each liked different things. So what does any good girlfriend/sister do? I make a few different flavors and send them a few of each. Who doesn't like a variety? I ended up making:  

-carrot cake with cream cheese icing, which are the orange ones pictured above with the little bit of green sugar on top and the orange white chocolate coating to represent a carrot
 -pumkin spice which were a pumpkin cake with some of the leftover cream cheese icing and covered in orange white chocolate melts that were pumpkin spice flavored. They didn't melt as smooth as regular chocolate melts, but they still were delicious
-birthday cake which were yellow cake with sprinkles and a vanilla buttercream and white speckled chocolate melts
-peanut butter/chocolate which were a peanut butter cake with peanut butter buttercream and covered with milk chocolate melts
-smores (they were the favorite) which were a chocolate cake with a marshmallow buttercream, covered in milk chocolate melts and rolled in graham cracker crumbs

These weren't hard to make at all, they're just a little time consuming. They're also great if you accidently overcooked your cake and it's a bit dry, nobody will ever notice when they're turned into cake pops.

Wednesday, February 18, 2015

Double Ds for your Birthday


My dad's birthday is in July. Last year, he turned 89, so I wanted to make him a cake that he'd never expect nor forget. What is is that guy's love so much, besides beer and football? BOOBS! It was too late for me to order a boob cake pan so I had to get creative. I went to Michaels in hopes that I'd find some kind of pan that I could make work. Sure enough, they had a ball cake pan that came in two half circles that I could use. I made a regular oblong cake and filled both halves up and bake them according to the instructions of whatever cake recipe you use. I happen to make a chocolate/vanilla marble cake for mine.

After they are completely cooled and ready to be iced, you can let the creativity begin. I made some buttercream icing and separated it into a couple bowls. Note that it takes a good amount of icing so I'd make maybe a double batch. I ran out and had to make more and let me tell you, it's hard to match up the colors when that happens. One, I added red food coloring and a lot of it, to make a rich red for the bra and then I bought a skin tone food coloring for Michaels to make the batch to make the cake look like skin. You have to trim the rectangle cake so you can fill in under the two circles.


You can seal it all together with icing. And once they're in the spots where you want them, start icing the cake with the skin colored icing, leaving space for where you want to put the bra or shirt or whatever clothing you are putting on it. Always remember to do the lightest color icing to the darkest. Once that is done, fill in the clothing part with the other color(s). I added some silver beads that I add a little bling to the cake. It said they were non edible tho, just for cake decoration, so it may be best if you find some kind of sprinkles or something that people can eat without chipping a tooth, especially if the people eating it have been drinking.


It's very hard to make butter cream really smooth and I didn't want to fight fondant to cover such an oddly shaped cake when I've never worked with it before, but luckily Google and YouTube were able to help me out. If you get Viva papertowels, they don't have any patterns in them and you can use them to press semi set buttercream and smooth it out so it looks more like fondant. It takes a little practice and if the icing isn't set enough, it will stick to the papertowel, but you can always just put it back in the fridge to harden a bit and try again in a few minutes. It took me a few tries, but I was able to get it looking pretty good in the end. and this was the end result...


Lastly I added a birthday message at the bottom so he knew the cake was for him. And boy was he surprised when he saw it.